Category: Uncategorized

  • Buffalo Chicken Dip

    Buffalo chicken dip is the kind of appetizer that disappears before everything else on the table. It is hot, cheesy, tangy from hot sauce, and rich enough to make plain tortilla chips suddenly interesting. This recipe gives you a reliable version that works every time — whether you are making it for a Super Bowl party, a Friday-night snack, or a potluck where you want to bring something people actually eat.

    The whole thing bakes in one dish and comes together in about 35 minutes. You can also make it ahead and reheat it without losing the creamy texture.
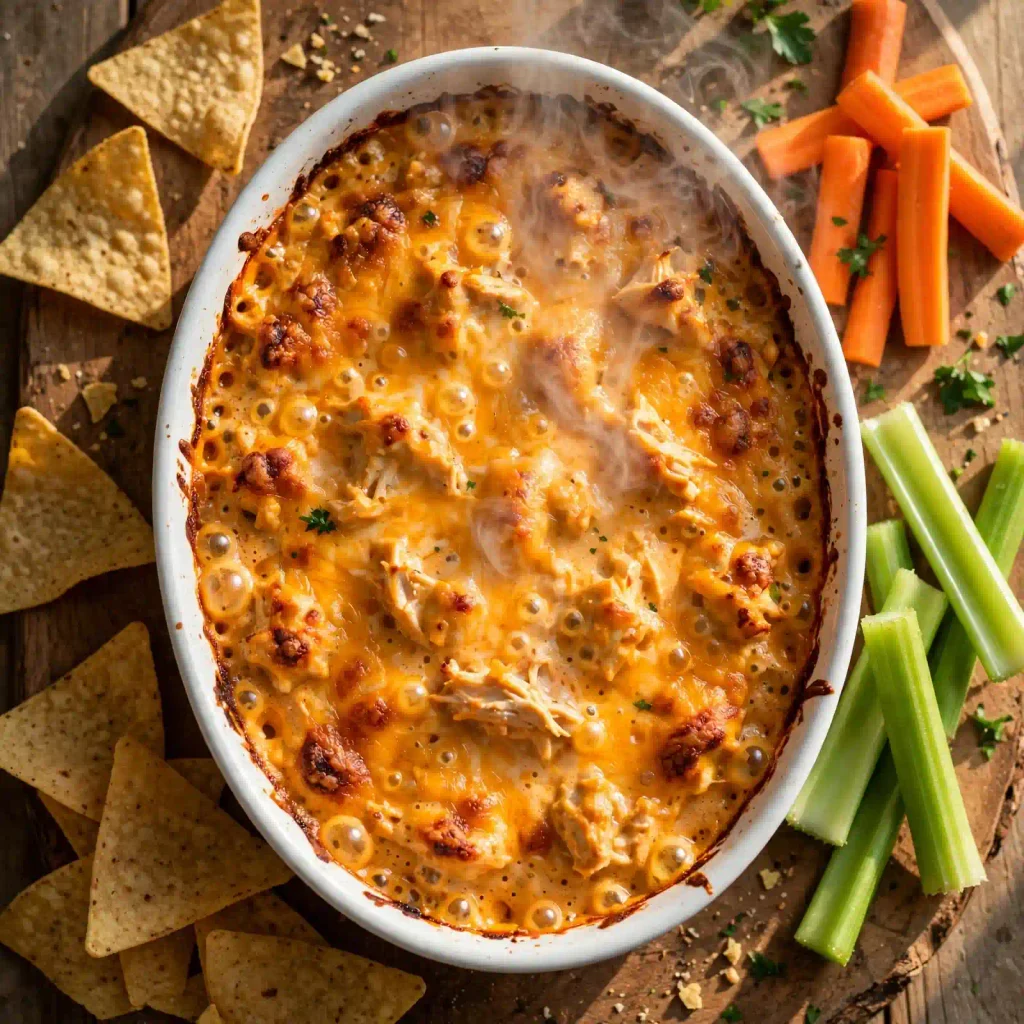
    buffalo chicken dip

    Why You’ll Love This Recipe

    • The texture is thick and scoopable without being gluey — cream cheese gives it body while shredded chicken adds something to bite into.
    • It is ready in 35 minutes, including baking time. If you use pre-cooked rotisserie-style chicken, prep drops to under 10 minutes.
    • The whole dip can be assembled the night before and baked straight from the fridge the next day, which makes hosting much easier.
    • Leftovers reheat perfectly and keep well for 3 days, so nothing goes to waste.
    • The heat level is easy to adjust — use less hot sauce for a milder version, more for a proper kick.
    • One baking dish feeds 8 to 10 people as an appetiser, making it one of the most cost-effective party dishes you can bring.

    Recipe Snapshot

    Prep time10 minutes
    Cook time25 minutes
    Total time35 minutes
    Servings8–10
    DifficultyEasy
    CuisineAmerican
    CourseAppetiser / Snack
    Estimated calories280 per serving

    Ingredients

    For the dip:

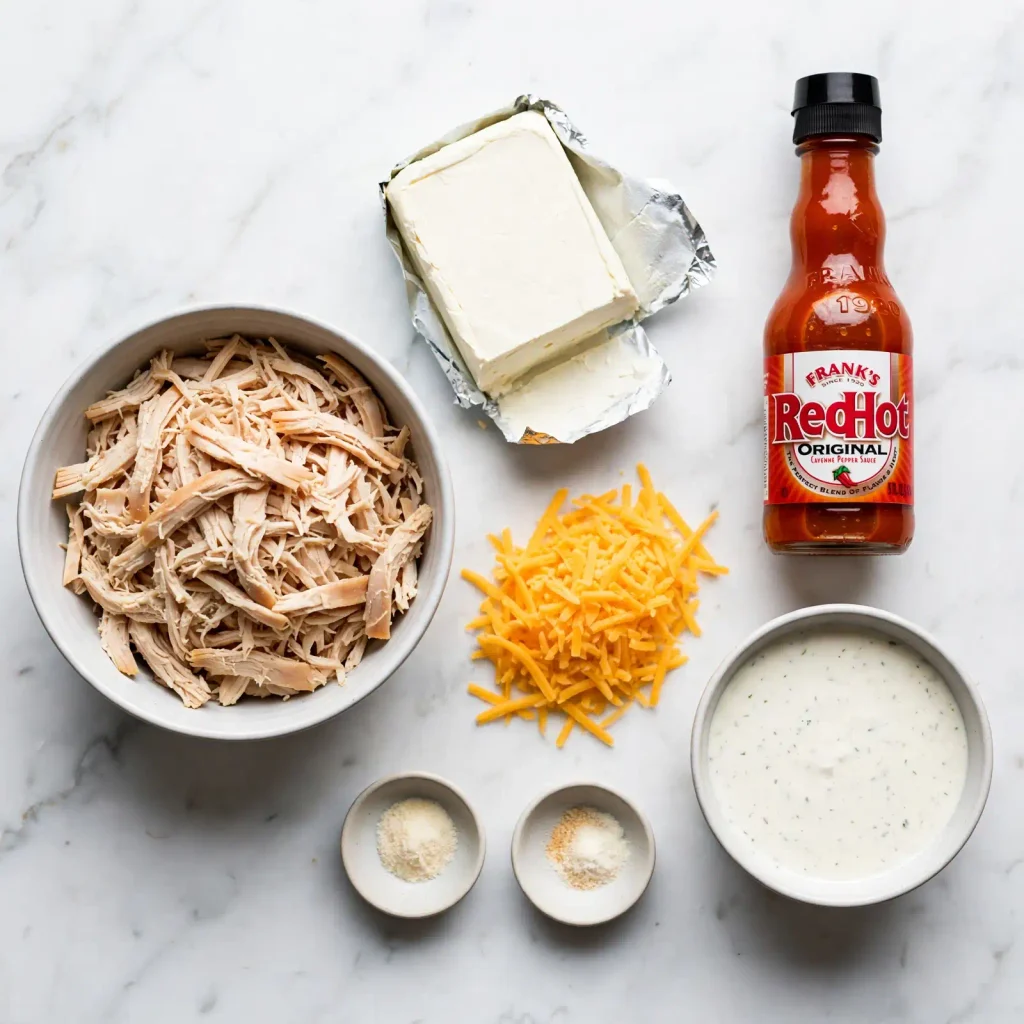
    • 450 g / 1 lb cooked chicken breast, shredded
    • 225 g / 8 oz full-fat cream cheese, softened to room temperature
    • 120 ml / ½ cup halal-certified ranch dressing
    • 120 ml / ½ cup Frank’s RedHot Original sauce (or any halal hot sauce)
    • 100 g / 1 cup shredded cheddar cheese, divided
    • ½ teaspoon garlic powder
    • ½ teaspoon onion powder

    Optional garnishes:

    • 2 tablespoons sliced spring onions
    • 1 tablespoon chopped fresh parsley

    Ingredient notes:

    Chicken: Halal-certified chicken breast works best. You can use freshly poached and shredded chicken, or halal-certified pre-cooked shredded chicken to cut prep time significantly. The chicken must be fully cooked before going into the dip.

    Cream cheese: Use full-fat for the best texture. Low-fat cream cheese tends to release more water during baking and can make the dip watery. Bring it to room temperature before mixing — cold cream cheese does not blend smoothly.

    Hot sauce: Frank’s RedHot Original contains no alcohol, no pork derivatives, and no prohibited additives. It is widely considered halal-compatible, though always verify the label on the bottle available in your region. If you cannot find it, use any halal-certified cayenne-based hot sauce.

    Ranch dressing: Standard ranch dressing contains no alcohol or pork derivatives and is halal-compatible. Choose a halal-certified brand to be certain, or make your own with buttermilk, mayonnaise, dill, garlic, and onion powder.

    Cheddar: Reserve about 30 g / ¼ cup of the shredded cheddar to scatter on top before baking. This creates the golden, bubbly top layer.

    Recipe Timing

    Prep time10 minutes
    Cook time25 minutes
    Total time35 minutes
    buffalo chicken dip

    Step-by-Step Instructions

    1. Preheat the oven. Set your oven to 175°C / 350°F. Lightly grease a 20 cm × 28 cm / 8 × 11 inch baking dish or equivalent-volume oven-safe dish with a neutral oil or cooking spray.
    2. Mix the base. In a large mixing bowl, combine the softened cream cheese, ranch dressing, hot sauce, garlic powder, and onion powder. Beat with a hand mixer on medium speed or mash vigorously with a fork until the mixture is smooth and fully combined with no visible cream cheese lumps. Chef’s Note: Beating the cream cheese before adding the chicken gives you a smoother, more evenly seasoned dip. If you add the chicken first, the mixture becomes harder to work through and you end up with pockets of unseasoned cream cheese.
    3. Add the chicken and half the cheese. Fold in the shredded chicken and 70 g / ¾ cup of the shredded cheddar. Stir until the chicken is evenly coated and the cheese is distributed throughout. Food safety note: Ensure the shredded chicken has already reached a safe internal temperature of 74°C / 165°F before adding it to the dip. Do not use raw or undercooked chicken.
    4. Transfer to the baking dish. Spread the mixture into the prepared dish in an even layer. Scatter the remaining cheddar (30 g / ¼ cup) evenly across the top. Chef’s Note: The reserved cheese on top is what gives you the golden, bubbling surface. If you mix all the cheese into the dip, the top stays pale and smooth — still tasty, but it misses the visual appeal and slight crisp edge that people expect.
    5. Bake. Place the dish in the preheated oven and bake for 20 to 25 minutes, until the edges are bubbling and the cheese on top is fully melted and just starting to turn golden at the edges. The centre should be hot and slightly jiggly when you shake the dish gently.
    6. Rest briefly and garnish. Remove from the oven and rest for 3 to 5 minutes before serving — this allows the dip to firm up slightly so it scoops cleanly rather than pooling. Scatter with sliced spring onions and chopped parsley if using. Chef’s Note: Serving straight from the oven makes the dip too liquid and it slides off chips. A short rest is the difference between a dip and a soup.

    buffalo chicken dip

    IMAGE 3 — CLOSE-UP SCOOP Alt text: Close-up of a tortilla chip scooping thick, creamy buffalo chicken dip from a ceramic dish, strings of melted cheddar visible Filename: buffalo-chicken-dip-close-up-scoop.jpg Prompt: Extreme close-up, slightly low angle. A ridged tortilla chip mid-scoop from a baking dish of buffalo chicken dip. Melted cheddar strings stretch slightly. The dip is orange-red with visible shreds of chicken. Warm, golden lighting from the side. Sharp focus on the chip and dip, shallow depth of field.

    CALLOUT BOX 1 — TECHNIQUE TIP Softened cream cheese is non-negotiable. If yours is still cold, microwave it in 15-second bursts until it gives easily when pressed. Cold cream cheese will leave lumps in the dip no matter how long you mix it, and those lumps bake into dense, flavourless patches.

    Expert Tips

    • Shred the chicken by hand, not too fine. Chicken shredded into longer strands holds up better in the dip and gives each scoop something to bite into. If you pulse it in a food processor, you end up with a paste-like texture that blurs into the cream cheese base.
    • Taste the raw mixture before baking. The hot sauce level is the main thing to adjust. Add more for heat or a splash of the ranch for a milder version. It is much easier to fix the flavour before it goes into the oven.
    • A cast iron skillet works well here. If you have one that holds around 1.5 litres / 6 cups, it retains heat longer than a ceramic dish, so the dip stays warm at the table for an extra 10 to 15 minutes.
    • Make-ahead: Assemble the full dip up to 24 hours ahead, cover tightly, and refrigerate unbaked. Bake straight from the fridge — add 5 minutes to the baking time since it starts cold.
    • Leftover storage: Cool completely, transfer to an airtight container, and refrigerate for up to 3 days. Reheat individual portions in the microwave in 30-second intervals, stirring between each, until hot throughout.

    Common Mistakes & Troubleshooting

    The dip comes out watery. This usually means the cream cheese was too cold and released moisture during baking, or the chicken was too wet. Pat shredded chicken dry with paper towels before mixing, and always use room-temperature cream cheese.

    The top is not browning. Most ovens at 175°C / 350°F will produce a lightly golden top after 25 minutes. If yours does not, switch to the grill / broiler setting for the final 2 to 3 minutes, watching closely so it does not burn.

    The dip is too thin after baking. It thickens as it cools. If it looks runny straight from the oven, rest it for 5 minutes before serving. If it is still very thin, you likely used low-fat cream cheese — full-fat is essential for a thick, stable dip.

    It is too spicy. Stir in an extra tablespoon of ranch dressing or cream cheese before baking. Once baked, a drizzle of sour cream or plain yogurt over the top at serving tames the heat without changing the flavour much.

    The cheese on top turned rubbery, not golden. This is typically overbaking. Cheddar starts to toughen if left in a hot oven too long after it has melted. Pull the dish as soon as the cheese is fully melted and just colouring at the edges.

    Allergen & Dietary Disclosure

    This recipe contains dairy (cream cheese, cheddar cheese, ranch dressing) and may contain gluten depending on the brand of ranch dressing and hot sauce used. Always check labels.

    Dairy substitution: full-fat coconut cream cheese alternatives work reasonably well for the base, though the flavour will differ. Dairy-free shredded cheese can replace the cheddar.

    This recipe contains dairy. It has not been tested in an allergen-free environment. Readers with allergies or intolerances should exercise caution and consult their healthcare provider.

    Variations & Substitutions

    Milder version: Reduce the hot sauce to 60 ml / ¼ cup and increase the ranch to 180 ml / ¾ cup. The result is still flavourful but much gentler on the heat.

    Spicier version: Add ¼ teaspoon cayenne pepper to the base mixture, or use a hotter halal hot sauce in place of part of the Frank’s.

    Extra cheesy: Mix in 50 g / ½ cup of shredded mozzarella along with the cheddar. Mozzarella adds stretch and pull, which works especially well if you are serving with toasted bread.

    Slow cooker version: Combine all ingredients in a slow cooker, stir, and cook on LOW for 2 to 3 hours or HIGH for 1 to 1.5 hours, stirring halfway through. The top will not brown but the texture and flavour are excellent.

    Dairy-free: Replace cream cheese with a plain dairy-free cream cheese alternative, and use a dairy-free shredded cheese. Use a dairy-free ranch dressing or make your own with plant-based mayonnaise and yogurt.

    Serving Suggestions

    Buffalo chicken dip is best served hot, straight from the oven. Set out dippers alongside so people can help themselves:

    Best dippers:

    • Tortilla chips (sturdy ridged ones hold up better than thin chips)
    • Celery sticks and carrot batons (the cool crunch balances the heat)
    • Toasted sliced baguette or halal naan pieces
    • Cucumber rounds for a lighter option
    • Bell pepper strips

    For a fuller spread: Pair with a simple dressed salad or coleslaw to balance the richness. If you are serving this as part of a game-day table, it works well alongside crispy wings, guacamole, and a fresh corn salsa.

    buffalo chicken dip

    CALLOUT BOX 2 — MAKE-AHEAD You can fully assemble this dip up to 24 hours ahead. Cover the unbaked dish tightly with cling film or a lid and refrigerate. When ready to bake, remove from the fridge and bake at 175°C / 350°F, adding 5 minutes to account for the cold start. Do not bake it partially and then refrigerate — that affects both texture and food safety.

    Storage, Reheating & Make-Ahead

    Room temperature: Do not leave buffalo chicken dip out for more than 2 hours. Cream cheese-based dips enter the bacterial danger zone quickly at room temperature.

    Refrigerator: Store in an airtight container for up to 3 days.

    Freezer: The dip can be frozen, but the texture changes on thawing — cream cheese tends to separate and become grainy. If you must freeze it, do so before baking, thaw overnight in the fridge, and bake fresh. Pre-baked and frozen dip is edible but noticeably different in texture.

    Reheating: Microwave individual portions in 30-second bursts, stirring between each, until hot throughout. To reheat the full dish, cover with foil and warm in a 160°C / 325°F oven for 15 to 20 minutes.

    Nutrition Information

    Per serving (based on 10 servings, dip only):

    NutrientAmount
    Calories~280 kcal
    Protein16 g
    Carbohydrates3 g
    Fat22 g
    Saturated fat11 g
    Fibre0 g
    Sugar2 g
    Sodium680 mg

    Nutrition values are estimates calculated from ingredients and may vary based on brands, preparation, and serving size. These values have not been laboratory tested.

    Conclusion

    Buffalo chicken dip earns its place at any table because it is genuinely satisfying — rich without being overwhelming, and spiced enough to keep people coming back for another scoop. The recipe itself is forgiving: you can adjust the heat, make it ahead, use leftover chicken, and scale it up easily for a bigger crowd. If you save this recipe to try later, pin it for your next game day or party spread.
  • Overnight Oats

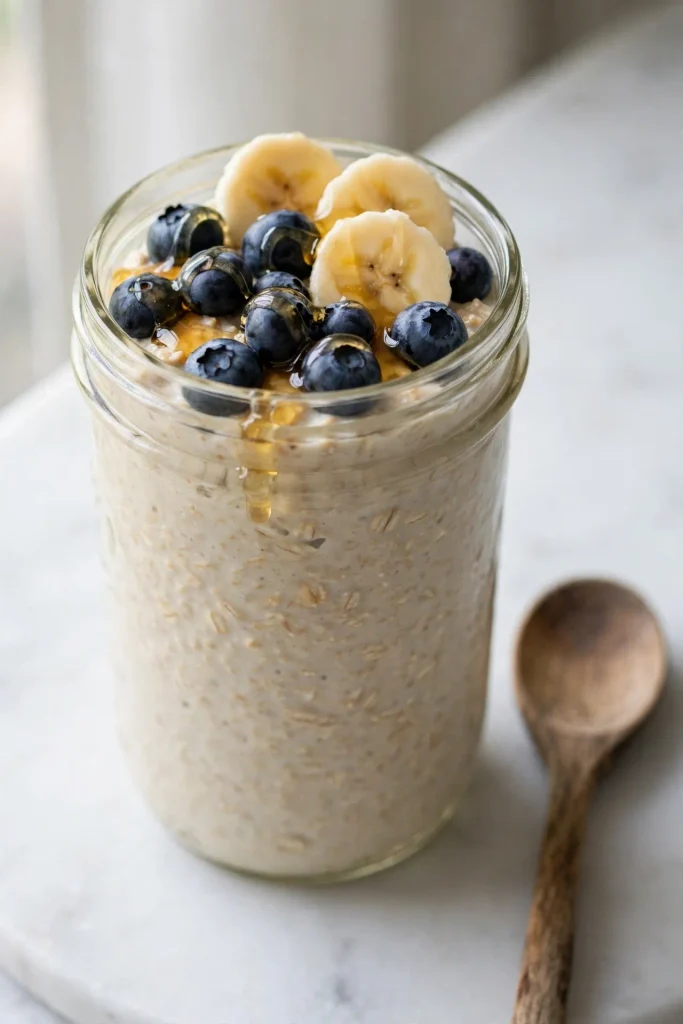
    Overnight oats are one of the most reliable no-cook breakfasts you can make. You stir together oats, milk, and a few extras in a jar before bed, refrigerate overnight, and wake up to a thick, creamy breakfast that needs zero effort in the morning.

    This recipe gives you the exact ratio that works every time, plus practical toppings, flavor ideas, and make-ahead tips so you can prep several jars at once.

    What are overnight oats?
    Overnight oats are raw rolled oats soaked in liquid (usually milk or a plant-based alternative) for at least 6 hours, typically overnight. The oats absorb the liquid and soften completely without any heat, giving you a creamy, pudding-like texture by morning.

    Why You’ll Love This Recipe

    • The texture is genuinely good. When the ratio is right, overnight oats are thick and creamy, not watery or gluey. This recipe uses a 1:1 oat-to-liquid base with a small addition of yogurt, which makes a noticeable difference.
    • Five minutes of actual work. There is no cooking, no standing over a stove, and nothing to watch. You stir, seal, and refrigerate.
    • Meal prep works perfectly here. You can make 4–5 jars on Sunday and have breakfast sorted through Friday. Each jar keeps well in the fridge for up to 5 days.
    • It works with almost any milk. Whole dairy milk gives the richest result, but oat milk, almond milk, and coconut milk all work well depending on your preference.
    • Toppings keep it from getting boring. The base is neutral enough that you can rotate flavors — banana and honey one day, berries and nut butter the next — without making a new recipe each time.

    Recipe Snapshot

    Prep time5 minutes
    Cook timeNone
    Rest time (overnight soak)6–8 hours (minimum 6)
    Total time6 hours 5 minutes
    Servings1 jar (easily multiplied)
    DifficultyVery easy
    CuisineInternational
    CourseBreakfast
    CaloriesApprox. 380 kcal (base recipe)
    Overnight Oats

    Ingredients

    Base recipe (1 serving):

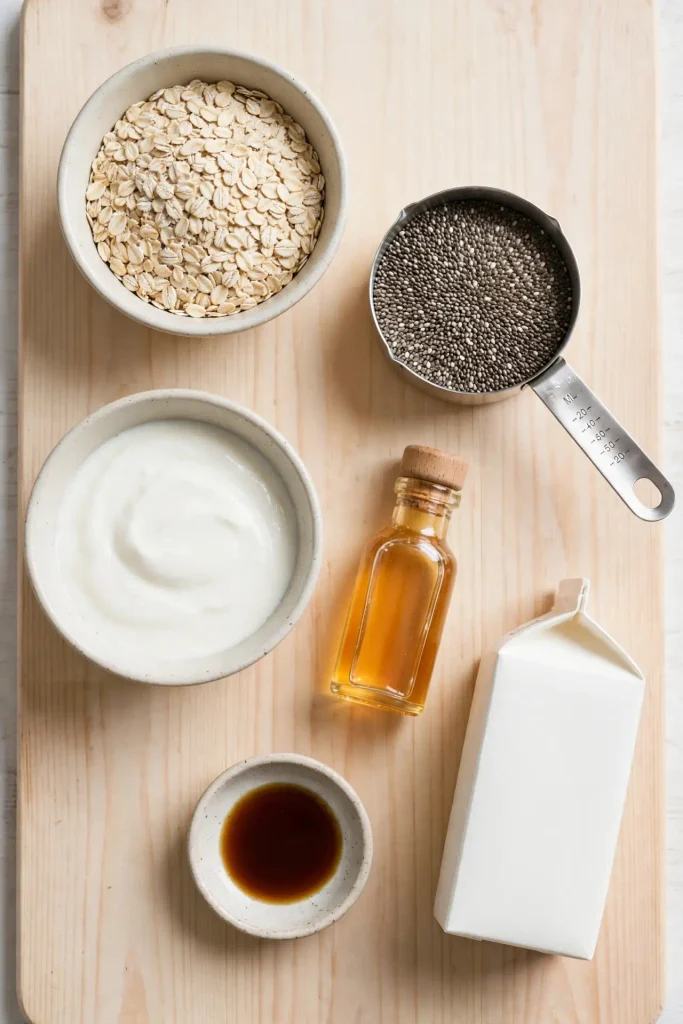
    • ½ cup / 45g rolled oats (not quick oats or steel-cut)
    • ½ cup / 120ml milk of your choice (whole milk or unsweetened plant-based milk)
    • ¼ cup / 60g plain yogurt (full-fat gives the creamiest result)
    • 1 tablespoon chia seeds
    • 1 tablespoon honey or maple syrup (adjust to taste)
    • ¼ teaspoon vanilla extract
    • Small pinch of salt

    To top (choose your combination):

    • Fresh berries, sliced banana, or stone fruit
    • Nut butter (1–2 teaspoons)
    • Granola for crunch
    • Extra honey or maple syrup

    Ingredient notes:

    Rolled oats are essential. Quick oats go mushy and lose all texture. Steel-cut oats do not soften sufficiently overnight and require a longer soak of 12+ hours or a brief cook. Use old-fashioned rolled oats for the right result.

    Yogurt thickens the mixture and adds a slight tang that balances the sweetness. Plain full-fat yogurt works best. Greek yogurt makes the oats noticeably thicker — useful if you prefer a very dense consistency.

    Chia seeds absorb liquid and create a slightly gelatinous texture that helps the oats hold together. They also add fiber and protein. If you dislike the texture, you can skip them and add an extra tablespoon of yogurt to compensate.

    Honey and maple syrup are both halal-compliant natural sweeteners. Some packaged granola toppings contain additives — check labels when buying pre-made granola.

    Recipe Timing

    Prep time5 minutes
    Cook timeNone
    Overnight soak6–8 hours (minimum 6)
    Total time6 hours 5 minutes (minimum)
    Overnight Oats

    Step-by-Step Instructions

    1. Choose your jar or container.
    Use a jar or container with a tight lid that holds at least 1 cup / 240ml comfortably. A 250ml or 350ml mason jar works perfectly. A container with a lid prevents the oats from absorbing fridge odors overnight.

    2. Add the oats.
    Measure ½ cup / 45g of rolled oats directly into the jar.

    3. Add the liquid ingredients.
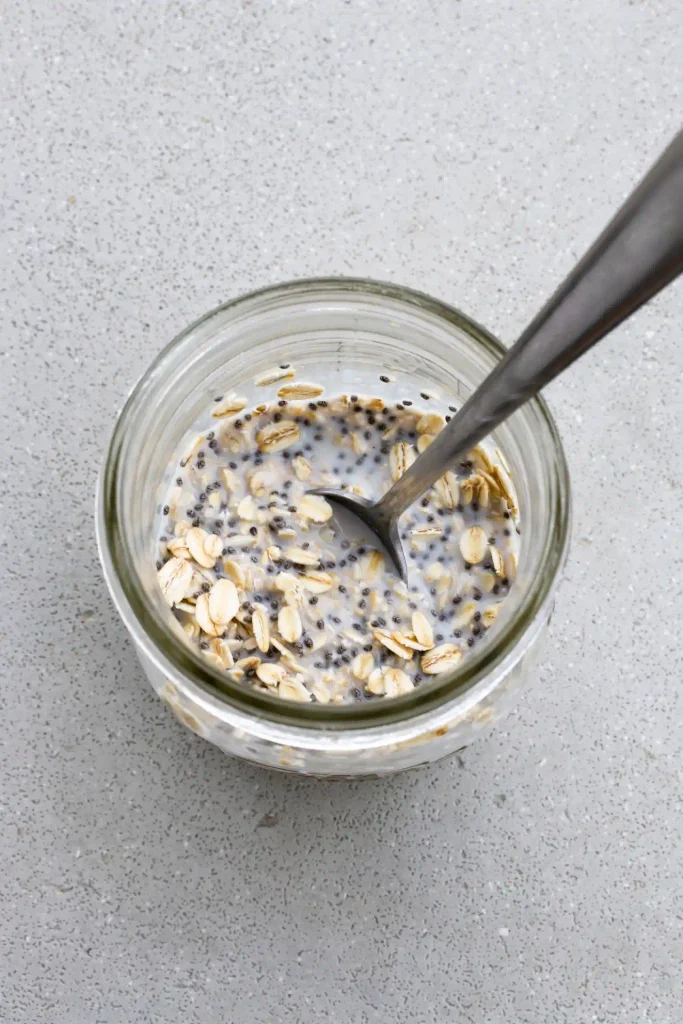
    Pour in ½ cup / 120ml of milk, then add ¼ cup / 60g of yogurt, 1 tablespoon of chia seeds, 1 tablespoon of honey or maple syrup, ¼ teaspoon of vanilla extract, and a pinch of salt.

    Chef’s Note: The salt is small but it matters. Even a small pinch sharpens the other flavors and prevents the oats from tasting flat.

    4. Stir thoroughly.
    Stir everything together until the oats are fully coated and the chia seeds are distributed evenly through the mixture, not clumped at the bottom. This takes about 30 seconds of proper stirring.

    Chef’s Note: Chia seeds clump quickly. Stir well immediately after adding them, and give the jar a second stir after 5 minutes if you are still awake, or shake it gently before you close the lid.

    5. Seal and refrigerate.
    Put the lid on tightly and place the jar in the refrigerator. Leave it for at least 6 hours. Overnight (7–8 hours) gives the best texture.

    Chef’s Note: The oats continue thickening as they soak. At 6 hours the texture is already good; at 8 hours it is noticeably creamier and more set.

    6. Check consistency in the morning.
    Remove the jar from the fridge. The oats should be thick and creamy. If they seem thicker than you’d like, stir in a splash of milk (2–3 tablespoons) until you reach the texture you want.

    7. Add toppings and serve.
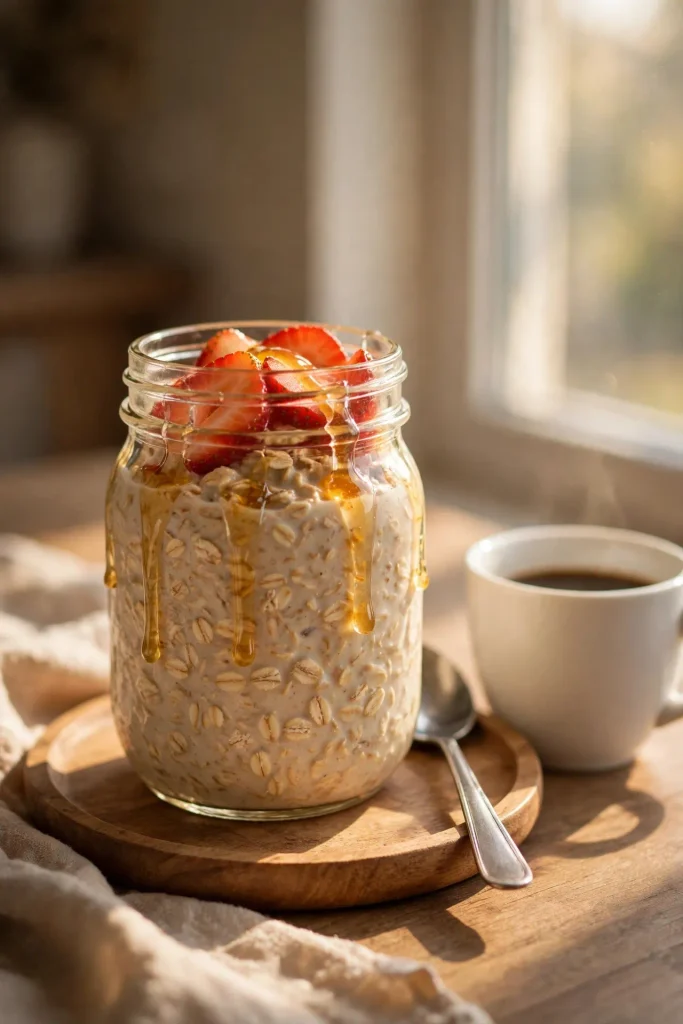
    Add your chosen toppings and eat directly from the jar, cold or gently warmed (see storage section for warming instructions).

    Overnight Oats

    CALLOUT BOX 1 — THE RATIO
    The base ratio for overnight oats is 1 part oats to 1 part liquid. This recipe uses ½ cup oats to ½ cup milk, plus yogurt, which adds both liquid and thickness. If you skip the yogurt, increase the milk to ¾ cup / 180ml to compensate. Getting this ratio right is the single most important step.

    Expert Tips

    • Use rolled oats, always. This cannot be overstated. Quick oats become a mush with no texture by morning. Rolled oats soften fully while keeping some body.
    • Full-fat dairy gives the best result. Whole milk and full-fat yogurt produce noticeably creamier oats than low-fat versions. If you are using plant-based milk, oat milk and coconut milk (from a carton, not a can) are the closest in creaminess.
    • Don’t skip the overnight soak. Six hours is the minimum. Anything less and the oats will still have a slightly raw, starchy bite in the center.
    • Add fresh fruit in the morning. Berries and banana soften if left in the jar overnight and can turn the oats watery. Add fresh fruit just before eating for better texture and flavor.
    • Scale up easily. Double or triple the base recipe and make 3–5 jars at once. The only limit is fridge space.
    • For warmer months, a cold base with cold toppings works well. For cooler mornings, overnight oats can be warmed — see the storage section.

    Common Mistakes & Troubleshooting

    The oats are too watery.
    This usually means too much liquid relative to oats, or the yogurt was low-fat or watery. Check that you measured both the oats and milk accurately (by volume or weight), and use full-fat or Greek yogurt next time. You can also stir in an extra tablespoon of chia seeds before the next soak — they absorb excess liquid well.

    The oats are too thick and dense.
    Add a splash of milk in the morning and stir. Start with 2 tablespoons, then adjust. Greek yogurt, in particular, can produce very dense oats that need loosening.

    The chia seeds are all clumped together.
    You did not stir thoroughly enough before refrigerating. They are safe to eat but the texture is uneven. Next time, stir immediately and again after 5 minutes. Alternatively, mix the chia seeds into the milk first and let them hydrate for 5 minutes before adding the oats.

    The oats still taste raw or chalky.
    They did not soak long enough. Six hours is the minimum — if you are eating before that, the oats may not have softened completely. Prep them earlier the previous evening.

    The topping made the oats soggy.
    Some toppings (especially soft berries and banana) release moisture overnight. Add fresh fruit, granola, and crunchy toppings in the morning, not the night before.

    Allergen & Dietary Disclosure

    This recipe contains:

    • Gluten (rolled oats — oats are naturally gluten-free but are typically processed in facilities that handle wheat; for a strictly gluten-free version, use certified gluten-free oats)
    • Dairy (milk and yogurt — substitute both with your preferred plant-based alternatives; unsweetened oat milk plus coconut yogurt works well)

    This recipe has not been tested in an allergen-free environment. Readers with allergies or intolerances should exercise caution and consult their healthcare provider.

    Variations & Substitutions

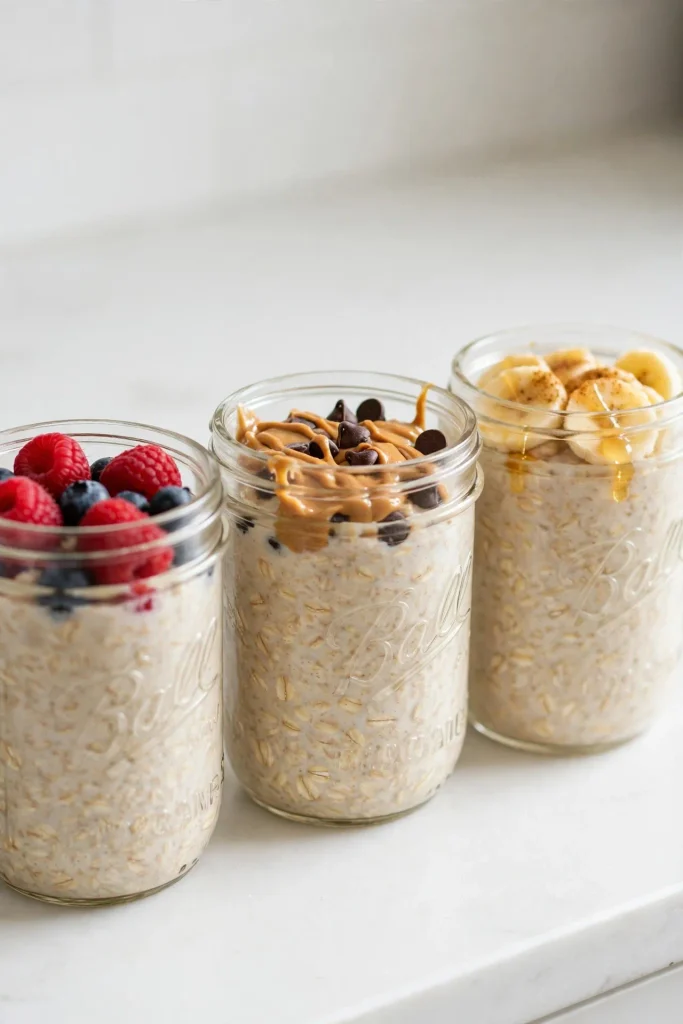
    Classic banana and honey: Mash half a ripe banana into the base mixture before refrigerating. Add honey and a pinch of cinnamon. Top with sliced banana in the morning.

    Berry and vanilla: Use vanilla yogurt in place of plain, add a handful of frozen raspberries or blueberries directly to the jar (they thaw overnight and infuse the oats with color and flavor).

    Peanut butter and chocolate: Stir 1 tablespoon of peanut butter and 1 teaspoon of cocoa powder into the base. Top with a few dark chocolate chips in the morning. Check that peanut butter contains no additives — pure peanut butter is halal-compliant.

    Dairy-free: Replace milk with oat milk or coconut milk (carton, not canned). Replace yogurt with coconut yogurt or soy yogurt. The texture is slightly different but still works well.

    Gluten-free: Use certified gluten-free rolled oats. All other ingredients in this base recipe are naturally gluten-free.

    No added sugar: Skip the honey or maple syrup entirely. Ripe banana mashed into the base provides natural sweetness, or rely on sweet toppings like fresh fruit.

    Overnight Oats

    Serving Suggestions

    Overnight oats are filling enough to eat on their own, but they pair well with:

    • A piece of fresh fruit on the side (if not already in the jar)
    • A cup of black tea or coffee — the mild sweetness of the oats complements both
    • A small handful of nuts on top for extra protein and crunch

    They work well as a desk breakfast, a post-workout meal, or a quick option for school mornings. For a more substantial breakfast, serve alongside a boiled egg or a small bowl of cut fruit.

    CALLOUT BOX 2 — MEAL PREP FOR THE WEEK
    To prep 5 jars at once, multiply every ingredient by 5 and divide evenly between 5 jars. Use the same lid-on, fridge-straight method. Jars last 5 days refrigerated. Add toppings to each jar only on the morning you eat it — don’t add fresh fruit or granola to all 5 jars at once.

    Storage, Reheating & Make-Ahead

    Refrigerator: Sealed jars of overnight oats keep well for up to 5 days. The texture gets thicker the longer they sit — just stir in a splash of milk before eating if needed.

    Room temperature: Do not leave overnight oats at room temperature for more than 2 hours, as the dairy can spoil.

    Freezer: Overnight oats can be frozen, though the texture changes noticeably after thawing — the oats become softer and the yogurt can separate. Freeze without toppings in a freezer-safe container for up to 1 month. Thaw overnight in the fridge.

    Warming: If you prefer warm oats, transfer from the jar to a small saucepan and warm over low heat for 2–3 minutes, stirring frequently. Or microwave in a microwave-safe bowl in 30-second intervals, stirring between each. Do not microwave in a sealed jar.

    Make-ahead: The entire recipe is a make-ahead dish by design. Prep Sunday night, eat through the week.

    Nutrition Information

    Per serving (base recipe, no toppings):

    NutrientAmount
    Calories~380 kcal
    Protein~14g
    Carbohydrates~52g
    Fat~12g
    Fiber~6g
    Sugar~18g (includes honey)
    Sodium~95mg

    Serving size: 1 jar (approx. 250ml assembled)

    Nutrition values are estimates calculated from ingredients and may vary based on brands, preparation, and serving size. These values have not been laboratory tested.

    Conclusion

    Overnight oats earn their place in the weekly routine because they genuinely work. Five minutes the night before removes all breakfast decision-making in the morning. The base recipe is simple enough to memorize after one or two attempts, and it is easy enough to keep interesting by rotating toppings and flavor combinations.

    If you make this overnight oats recipe, the jar-and-fridge method works every time — no special equipment, no cooking skills required, and no wasted mornings scrambling for something to eat.

    Save this recipe to your Pinterest breakfast board so you have it ready the next time you want to get a week of breakfasts sorted in one go.

    Overnight Oats

    Overnight Oats

    Make creamy overnight oats in 5 minutes with this foolproof ratio. Prep a week of breakfasts at once — no cooking, no stress.
    Prep Time 5 minutes
    chill time 6 hours
    Total Time 6 hours 5 minutes
    Course: Breakfast
    Cuisine: American
    Calories: 380

    Ingredients
      

    • ½ cup / 45g rolled oats
    • ½ cup / 120ml milk dairy or plant-based
    • ¼ cup / 60g plain yogurt full-fat recommended
    • 1 tablespoon chia seeds
    • 1 tablespoon honey or maple syrup
    • ¼ teaspoon vanilla extract
    • Small pinch of salt

    Method
     

    1. Add rolled oats to a jar or container (minimum 250ml capacity).
    2. Add milk, yogurt, chia seeds, honey or maple syrup, vanilla, and salt.
    3. Stir thoroughly until all ingredients are combined and chia seeds are evenly distributed.
    4. Seal with a lid and refrigerate for at least 6 hours, preferably 7–8 hours.
    5. In the morning, stir well. Add a splash of milk if the oats are thicker than you prefer.
    6. Add toppings and serve cold, or warm gently in a saucepan or microwave.

    Notes

     Do not use quick oats or steel-cut oats. Rolled oats are essential for the correct texture. Add fresh fruit and granola toppings on the morning of eating, not the night before.